Have you ever tried to cast the perfect person for your character of color only to see the same couple of face claims over and over again? Well I have a solution for you!
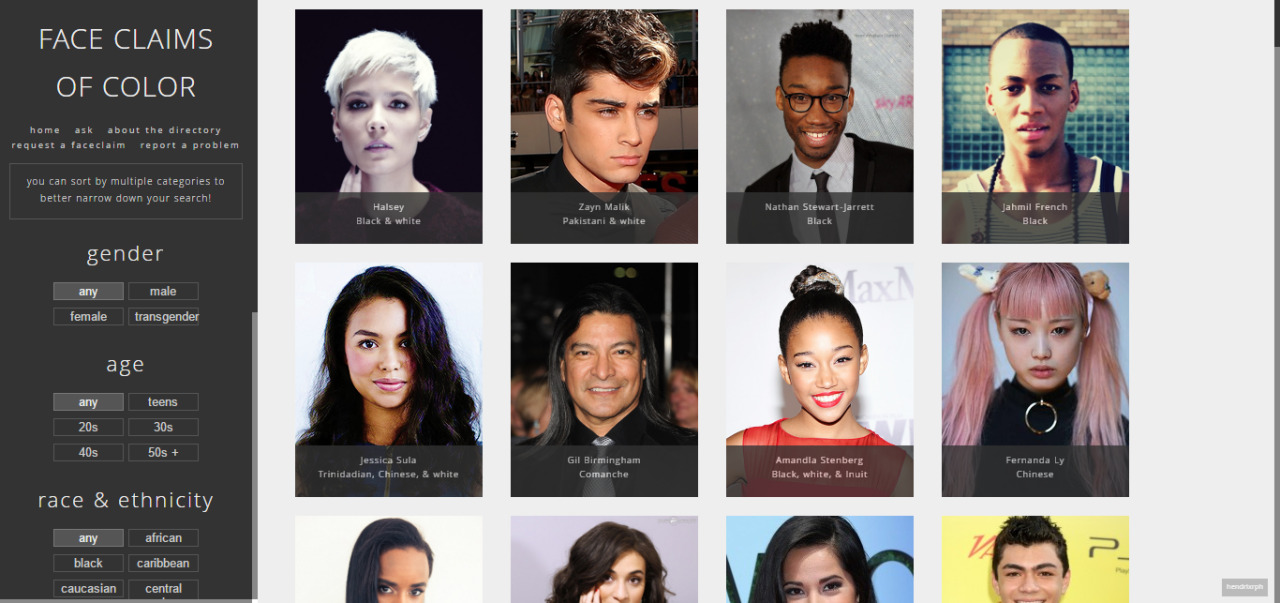
Face Claim Diversity Presents: The Face Claims of Color Directory!
Face Claim Diversity is brand spanking new, fresh off the lot, state-of-the-art blog dedicated to providing resources just for face claims of color. For the past few months, I’ve been working on the directory and the themes and I’m ready to show-case it!
The directory is easy to use, features tons of people of color (though it’s still very much a work-in-progress!), has plenty of options to narrow down your search, and has a guide in case you need help. I’ve tried to find lesser-known models, actors, and musicians to feature in the directory, though there still are some familiar faces. When you hover over the pictures, more information will show up.
As time goes on, I will add to the directory. But, since I am in school full-time and work, much of my time is taken up. To make things go faster for me, submit a face claim for me to add if you’d like! Also, if you’re interested, please consider rating the blog so I can make it the best it can be. You can also be a part of this project by sending me a message to apply to be a mod!
Please reblog this post if you’d like and to spread awareness! I’d appreciate it!
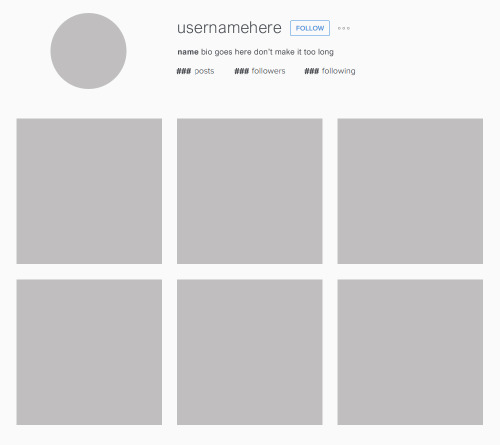
I recently found the need to use an Instagram template on Photoshop and when I couldn’t find one that was exactly as I wanted it I decided to make my own. This is based on the current 2016 version and the layout is made exactly the same as it appears on desktop. Fonts and colours are matched to a near exact – the one used here is Arial Nova in varying shades of grey (the font should already be installed on your computer if you use Windows 10, if not try Arial on a 96% width for a good dupe). I’ve organised the PSD file into folders to make it less confusing but a working knowledge of clipping masks will be needed to make this work. The follow button is also included in its own layer so you can move it around as required depending on username length. I’ll try to answer any questions you have about how to use it if you need them but it’s fairly simple! Please reblog/like and credit (where appropriate) if used or downloaded. An example graphic using this PSD can be seen here.
If you’re planning on one day turning your manuscript in to literary agents and publishing houses, you need to make sure it’s formatted correctly. In many cases, your manuscript will be skipped over if it isn’t done to industry standard, so here’s the basics that you’ll need if you don’t want to be ignored. Before I get started, please know that this is aimed specifically at fiction manuscripts. If you’re writing non-fiction or a memoir, the expectations will be different, so it would be wise to Google what you need.
The Basics
Make sure your font is 12 point Times New Roman, Courier New, or Arial. These are the only three fonts you are allowed to pick from.
Your spacing should be 1 inch on all sides of the text. This is the default on most word processors, but double check your settings just to be sure.
Your text should be double spaced.
All of your indentations must be a half inch. Do not press indent. Instead, drag over the top arrow on the ruler to have every new paragraph automatically indent.
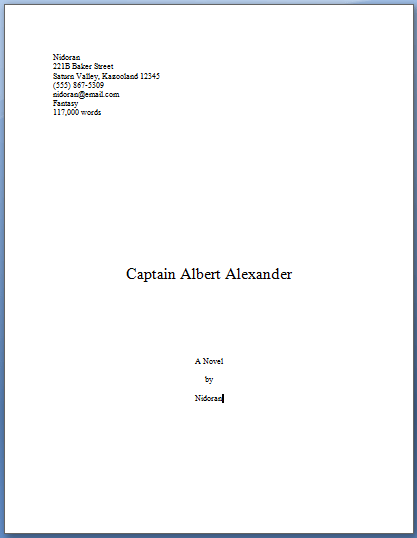
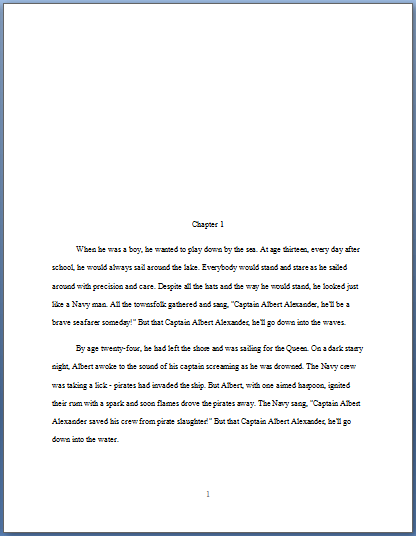
The Title Page
The top left-hand corner of your title page will have all your personal information. They want to see your name, address, phone number, e-mail address, the novel’s genre, and word count.
Your novel’s title is allowed to be between 20-24 point font if you want. Bold is also an option, but not necessary.
The title will appear halfway down the title page.
“A novel by [your name]” will be about three quarters of the way down the page.
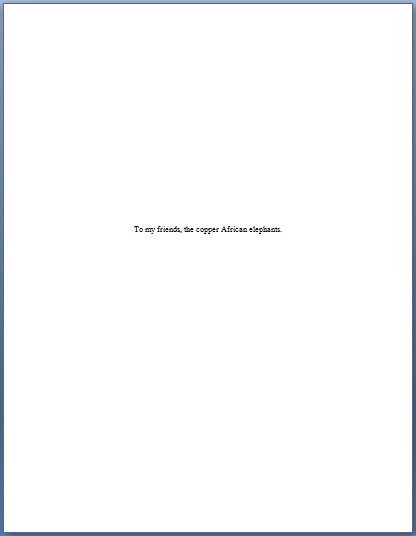
The Next Pages
If you have a dedication, it will be on its own page.
If you have some sort of verse or quote, those will also need their own pages.
Do not include a page for acknowledgements.
The Chapters
Chapter titles will be 12 point font. No bolding or italics.
Chapters will start from one quarter to halfway down the page.
An easy way to format chapter headings is to press enter five or six times
Make sure you always start your chapters the same way every time.
When you start a new chapter, make sure you use a page break to bump the new chapter onto a new page. This will keep it in place so that it will never budge, no matter how much you cut out or add to the previous chapter.
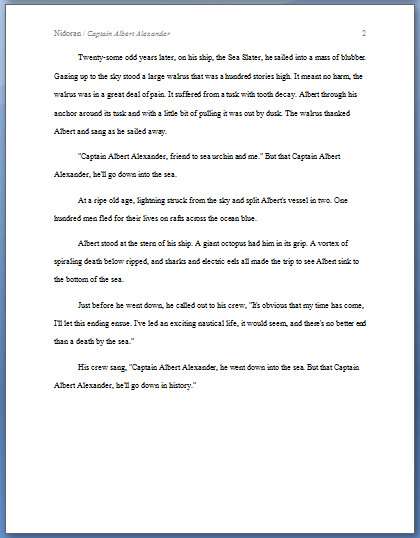
Page Numbers
Page numbers will start with 1 on Chapter 1 of your manuscript. Page numbers will not appear on the title page or dedication page.
Page 1 will be labeled in the footer of Chapter 1. It should be centered.
Page 2 will be in the header of the next page.
From page 2 onward, your headers will be labeled like this:
If you insert a section break after the title and dedication pages, it will make it easier to insert the page numbers.
For the most part, this is the most important of what you’ll need to know for formatting your manuscript. I used this video as reference, so I’m trusting everything it says is true because it was made by an author who has several novels published, and because it was uploaded this year, it should be up to date.
But just remember, whenever you go to turn in a manuscript, make sure you check the website of the agent or publisher you’re trying to contact. They might have specifications that differ with the ones stated in this video, and you should always do whatever you can to abide by what they want.
Reblogging aggressively. Some publishers will throw your manuscript into the slush pile or, worse, the trash if you don’t follow their desired format. Spec fic publishers are especially strict about manuscript formatting.
if you’re anything like me, working on a computer is a dangerous thing. i’ll get distracted by everything – that one email i should respond to, all the pictures of my dog, tumblr, and so on. I recently discovered an amazing resource to stop that.
when you open it, it shows this screen, where you can choose either a time limit or word goal
then when you start, it opens a document that fills the entire screen like this
and you cannot quit the app or open anything else until your word/time quota is filled. i just wrote half of my english speech that i’ve been putting off all morning, and it took only 20 minutes!
so yup, it’s called writer’s block and is free for both mac and windows. enjoy!
* Tumblr2Wordpress –
Does not get pictures-etc or comments, allows you to archive other people’s blogs, allows you to keep multiple blogs separate easily.
Exports to WordPress’s XML format, should work for WordPress.com blogs.
Very simple, an okay choice for quick/emergency backups even if you don’t use WordPress.
* WordPress.com‘s built-in Tumblr importer–
Does not get pictures-etc or comments, does not allow you to keep
multiple blogs separate: as in, if you import more than one blog, they’ll all get mashed together into one.
To be very, very clear: this importer definitely
and for-real does not save pictures, music, and other media! It’ll look like it grabbed your stuff, yes – but if you check the image urls you’ll see it’s just loading them from Tumblr.
Basically, I recommend this one only if you want to back up or mirror just one mostly-text blog.
Exports directly to the WordPress installation you’re running it from, does not work for WordPress.com blogs.
* tumblr-utils
–
Gets
pictures-etc, does not get comments, allows you to keep blogs separate. A set of Python scripts that export to a simple HTML archive.
Requires you to install Python 2.7 and type a command line comment.
* Jekyll’s tumblr-import – Gets pictures-etc, does not get comments, allows you to keep blogs separate if you configure it that way. Exports to Jekyll’s MarkdownHTML format. Similar to tumblr-utils but 1) much more flexible output, 2) much harder to set up, and 3) requires Ruby, not Python.
* Tumblr API V2 posts function – If you want comments/other notes/downstream reblogs, or if you want to try to archive whole tags site-wide, you’ll need to mess around with this thing.
It retrieves stuff in Tumblr’s alarming-looking JSON format, but at least you’ll have all the information.
If you only want public content, you can just use the API key they provide in the examples. In that case, you may be able to just kinda generate a series of URLs like this:
However, for things like your likes, drafts, or queue – anything that requires logging in – you’ll need to register to use OAuth and do some actual coding. I am very, very sorry.
I do not know how OAuthorize without at least starting out using Sinatra or Rails or something, sorry. Someone more competent than me please provide an example? However, once you’ve done the OAuth handshake process once, you can dispense with Sinatra and just use the access token and secret you got to configure Tumblr::Client objects in the future.
hey just a wee thing if you’re an aspiring creator of historical fiction like moi
if you’ve ever sat down to write your story and thought ‘ok but what is the historical backdrop for these characters on this particular month, or this day, in this country, in this city’
the british newspaper archive [link] has literally millions of archived newspaper pages going all the way back to the 1700s
so if you’re like me and thinking ‘ok but what was going on in edinburgh in may 1914??’ this archive has got you covered, pal
Because my blog is getting a lot of traffic right now, I feel it’s a good opportunity to link to the online texts of Tolkien’s books for anyone who wants to read or reference them.
This is a fun option if you use, for example, phrases in other languages in your story. I often do, and this is a nice way to give translations without having to scroll to the end of the text, or putting them in the starting notes where people have to keep checking back – or where they spoiler the story!
HOWEVER. The drawback is that the floating boxes only work when a ‘mouse’ is ‘hovered’ over the marked text. They do NOT show up on tablet or phone screens, so you’ll still need to put a list of translations in the notes for readers using those devices.
Let’s have an example.
“Qu’est ce que tu veux?”
Now if you speak French, you might know that means “What do you want?”
But not all of your readers will know that. So, you offer them a translation. And since the boxes don’t appear unless you hover directly above them, I usually add a Beginning Note to the chapter that reads something like this;
‘Hover over italicised foreign language text for translations! (Mobile and tablet users please see the Ending Notes)’
In HTML mode in Ao3, (if you try this in Rich Text mode you will get a horrible mess so don’t) the line with this example would appear as:
<p>“<em>Qu’est ce que tu veux?</em>”</p>
To add the floating box with the translation, you would select the words to be translated (that is, Qu’est ce que tu veux?) and paste in the following HTML.
<span title=“What do you want?”>Qu’est ce que tu veux?</span>
The whole line will now read:
<p>“<em> <span title=“What do you want?”>Qu’est ce que tu veux?</span> </em>”</p>
Review your work, hover over the part that requires translating, and you should see the following:
And you’re done!
I tend to set up a Word doc with all the <span> lines I want to use created in it, and then when the time comes, just copy/paste them into Ao3. Saves lots of time!